Posts

Toilet Paper Roll Planting
Image
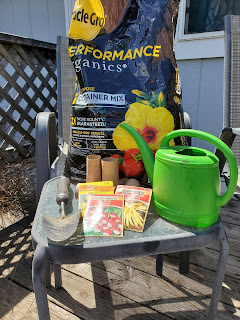
This project uses something we all have lying around, toilet paper rolls!   Materials Needed:  *Toilet Paper rolls  *Potting soil or dirt *Seeds *Water *Small shovel To do this project start by folding the end of the toilet paper roll as shown in the pictures below.                                     Now, use the small shovel and add potting soil or dirt, make sure you leave about half an inch of empty space at the top.                                      Once you have your soil done make a small well in the dirt and put 3 (of the same ) seeds in the well. Then recover the seeds with soil.                                      Now add a little water and wait........ It took my plant about 5 days to sprout. Don't forget to water it every day. This is about 8 days after planting, I used 4 different types of seeds.

Fruit and Vegetable Print

Image
This project was done using apples, potatoes, celery and lettuce to make stamps. With acrylic paint serving as ink. Materials: • Various fruits and vegetables such as apples, celery, potatoes, and romaine lettuce hearts. • Knife • Paint brushes • Acrylic or any type of paint • Paint tray • Water • Colored pencils • Multi media paper To do this project start by cutting the apples in half, slicing the potato in 2 inch chunks, cut a stalk of celery, and cut the bottom 2 inches from the romaine lettuce heart. Now, using the knife cut pieces away from the apple and the potato to form patterns. Next use a brush to apply paint, any color to the fruit or vegetable, press the vegetable, paint side down onto your paper. Be careful not to move or slide it to prevent smearing the paint. Do this with several other vegetables or fruit that you cut. After I did a few I decided that it was starting to look like ocean creatures. Once the paint has dried use colored pencils

Spray Paint Canvas

Image
Spray paint canvas   Materials needed were  Acrylic paint  Spray bottle(s)  Canvas  Box for the canvas to sit in while you are painting Water  First add the paint to the spray bottle, then add ⅓ of the water to the paint ratio. Second, mix the paint and the water together and set your canvas in your box so you don't get paint everywhere, then paint your canvas how you’d like. You can use as many colors as you want, and design it however you like. 

Crayon Heart

Image
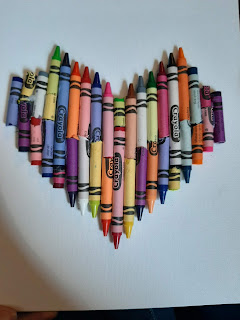
Crayon Heart  Materials used  Crayons  Glue gun Scissors  Papper  Pen Canvas  First you need to draw and cut out a heart template for your crayons to fit on. Next you glue the paper heart on the canvas and fix your crayons however you would like them, glue the pieces one by one till the heart is filled. You can design and decorate how ever you would like there's no wrong way to decorate. 

Color Wheel Mandala

Image
This color wheel mandala was made using water color and sharpie. The color wheel on the left shows primary and secondary colors. The color wheel one the right shows primary, secondary, and intermediate colors. Materials • Water color paints in yellow, red and blue. • Paint Brushes • Container for water • Napkins or paper towels • Water color paper • Pencil • Drawing compass • Ruler Black marker     To do this project- Use the compass to create two circles, split one circle into 6 even pieces and the other into 12 even pieces. Then use blue, yellow, and red to fill in the pieces of each wheel as seen in the picture. Then mix the yellow and red and fill in orange between the yellow and red as shown on both pictures (notice the placement in the 12 piece wheel). Do the same using yellow and blue and then blue and red. No the wheel with primary and secondary colors should be done. On the wheel with the primary, secondary, and intermediate

Symmetrical Paper Mask

Image
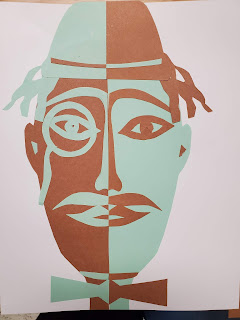
Symmetrical Paper Mask From: The Art Teachers Survival Guide for Elementary and Middle School By: Beverly Biernot Materials • Card stock • 2 different colors of  construction or colored paper • Scissors • Glue stick • Chalk To do this project begin by selecting two colors of paper. As seen in the picture I chose green and brown. Fold both pieces of paper exactly in half vertically (Hot dog). Use the scissors to cut on the folded line, cutting each paper in half. Now, lay one half of each color on top of each other. Be sure to line up the edges. Use the chalk to outline of half of a head, including the ear. Hold the papers firmly together, use the scissors to cut out the outline. Now glue the pieces side by side on the card stock. Use the other half of each paper to make the details for the face. Be sure to stack both colors to make mirror images, one for each side. 

Origami Butterfly

Hello, In this video made by Noah you will find step by step directions on how to make an origami butterfly! Part 1 Part 2 I hope you had fun making this Origami butterfly!